Sample Script for Repository Backup on daily basis
#!/bin/bash
############## Initialization ###########################
LOG=/home/infa/Scripts/logs/infa_rep_backup.log
BACKUP_DAY=`date +"%a"` ## Mon Tue Wed Thu Fri Sat Sun
BACKUP_FILE=$PMRootDir/Backups/rep_infa_qa_backup_$BACKUP_DAY.rep
Tuesday, December 17, 2013
Tuesday, November 19, 2013
Informatica Powercenter Repository Backup
Step 1
Log onto the Admin Console.
Step 2
Select Repository service from Domain Navigator.
.
Step 3
Click on Actions >> Repository Contents >> Back Up.
Step 4
Enter User credentials and Backup file name.
Click OK.
Step 5
Back up complete.
Log onto the Admin Console.
Step 2
Select Repository service from Domain Navigator.
Step 3
Click on Actions >> Repository Contents >> Back Up.
Step 4
Enter User credentials and Backup file name.
Click OK.
Step 5
Back up complete.
Monday, November 18, 2013
Informatica Powercenter 9.5.1 - Create and Apply Labels
Step 1
Login to Repository Manager.
Select "Versioning >> Labels ".
Step 2
Create new label using Label Editor.
Enter appropriate Label Name and Click OK to create the label.
Step 3
To Apply labels - Select "Versioning >> Apply Label".
Step 4
Apply Label wizard will popup. Click next.
Step 5
Add objects to be labeled. Click next.
Step 6
Open Label browser and select appropriate label.
Step 7
Select "Label all children"/"Label all parents" options if required.
Click Apply.
Step 7
Label applied to the selected objects.
Login to Repository Manager.
Select "Versioning >> Labels ".
Create new label using Label Editor.
Enter appropriate Label Name and Click OK to create the label.
Step 3
To Apply labels - Select "Versioning >> Apply Label".
Apply Label wizard will popup. Click next.
Step 5
Add objects to be labeled. Click next.
Step 6
Open Label browser and select appropriate label.
Step 7
Select "Label all children"/"Label all parents" options if required.
Click Apply.
Step 7
Label applied to the selected objects.
Saturday, November 16, 2013
Informatica Powercenter 9.5.1 Express Edition Install for Windows
Step 1
Download Powercenter express Personal edition ( free download ) from https://community.informatica.com/solutions/pcexpress
Step 2
Extract zip file PowerCenter_Express_Server_Client_Installer_winem-64t.zip.
Click on install.bat
Step 3
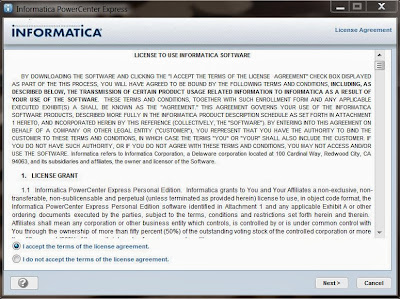
Installation wizard will pop up. Accept terms of the license agreement.
Click Next.
Step 4
Select installation directory and license file location. Click Next.
Step 5
Review pre installation summary. Click Next.
Step 6
Installation in progress.
Step 7
Configuration in progress.
Step 8
Setup Administrator credentials and click next.
Step 9
Defining the domain.
Step 10
Installation complete.
Subscribe to:
Comments (Atom)


